
Since I have been asked several times, here is the tutorial in English. (Sorry if there are any mistakes, don't hesitate to correct me! )
What you need:
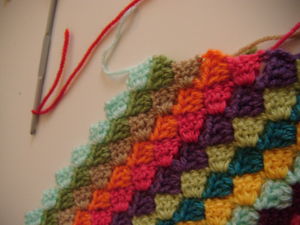
Wool in several colors (there are 13 colors in the sample above)
A crochet (the size recommended for the wool)
Scissors
That's all!
Tuto :
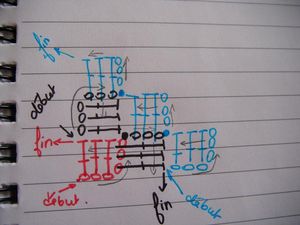
This is made in two steps : one for increases, one for decreases. The only change is in the beginning and the end of each row, but the idea stays the same.
!!You will need to turn your work between each row!!
What I call treble is treble for UK, double for US:
yarn over, insert hook through next stitch, yarn over, hook back through stitch (3 loops on hook), yarn over and pull through 2 loops (2 loops on hook). yarn over and pull through 2 remaining loops.
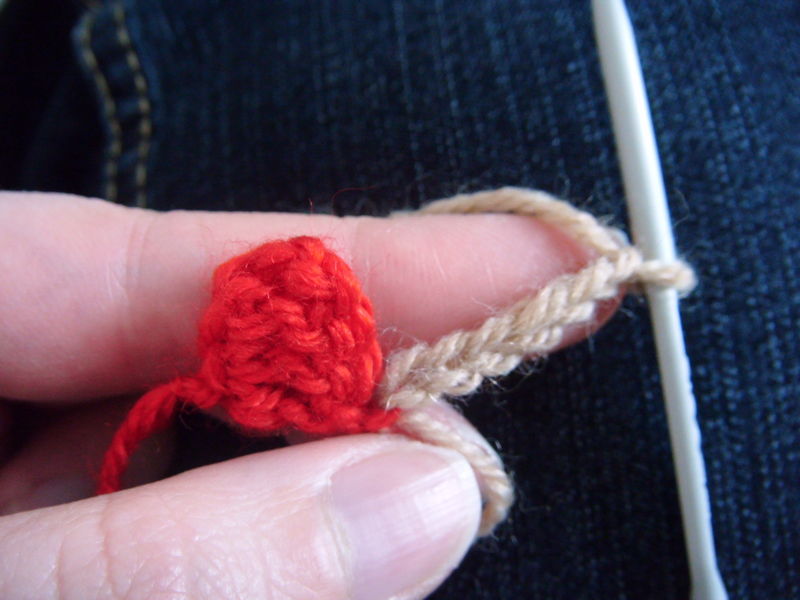
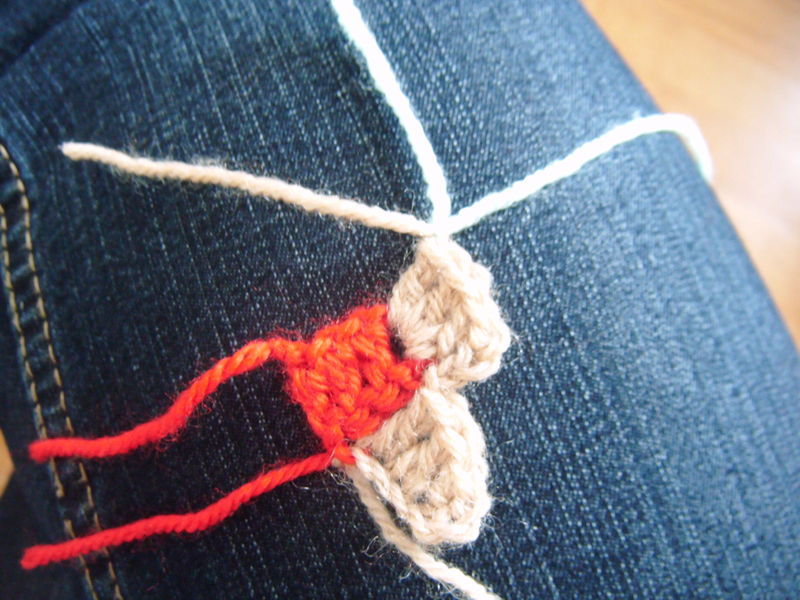
To begin :
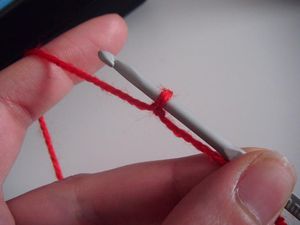
Chain 6 (=3 chain + 1 treble).
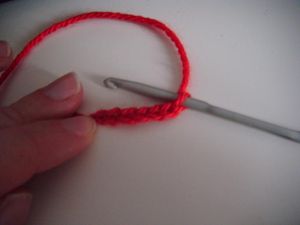
Then do 1 treble in the third chain from the beginning, and 2 other treble in 2nd and 1st chain.

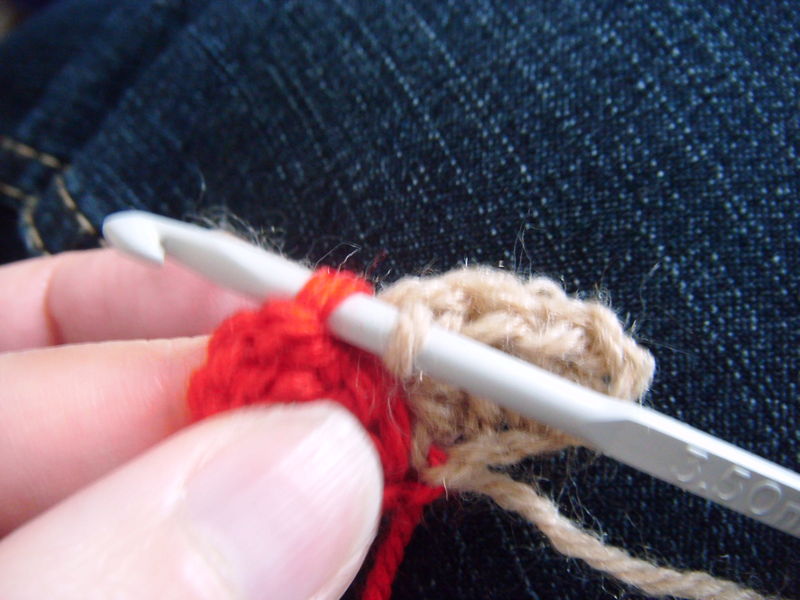
There you are, the first square is done. Cut your thread if you want to change color.
Increase rows :
Begin by joining the new color (knot the new yarn with the one you cut before). Turn your work.
yarn over, insert hook through next stitch, yarn over, hook back through stitch (3 loops on hook), yarn over and pull through 2 loops (2 loops on hook). yarn over and pull through 2 remaining loops.
To begin :

Chain 6 (=3 chain + 1 treble).


Then do 1 treble in the third chain from the beginning, and 2 other treble in 2nd and 1st chain.


There you are, the first square is done. Cut your thread if you want to change color.
Increase rows :
Begin by joining the new color (knot the new yarn with the one you cut before). Turn your work.
Chain 6 (= 3 chain + 1 treble)

You will work this first square just as the first one in the beginning, aka 3 treble in the first 3 chains.

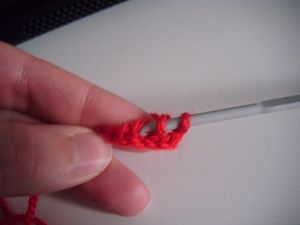
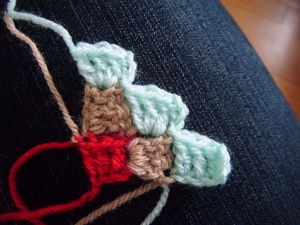
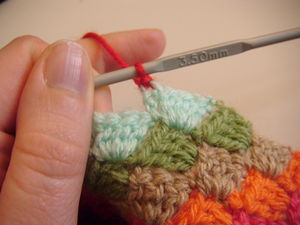
Here, you join with a slip stitch to the top of the previous row/square:
Then again : 3 chain followed by 3 treble in the space between the 2 first treble of the square of the row under.
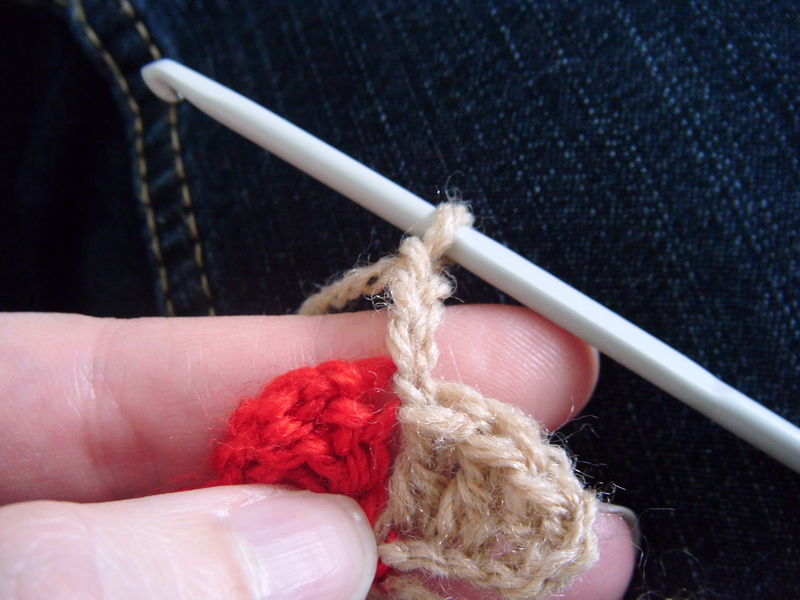

(It means there will only be 3 trebles shown by square when the work is done, since the 4th will be hidden under the trebles of the row above)Then you cut your thread, and make a knot with the following color.

And then again :
Turn Work
Chain 6
3 treble in the first 3 chain followed by a slip stitch in the row before to join:


Then Chain 3 and work 3 trebles in the first 3 chain of the previous row, join, etc.
You are done with the increases. Keep doing this until you reach the width you want.
To decrease :
The idea stays the same for the inside of the rows. The only change is in the beginning and the end of each row.
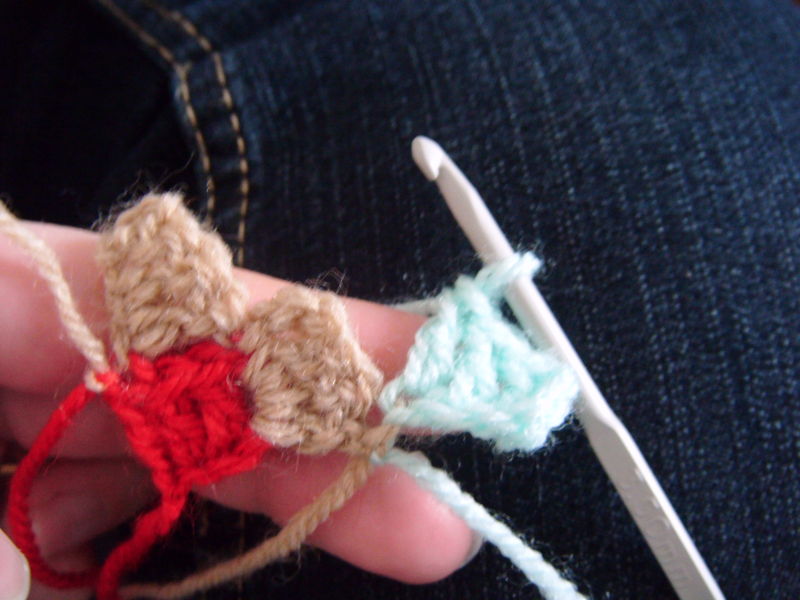
Begin by a slip stitch in the beginning of the row (see pictures) :
Then work as follow :

Then Chain 3 and work 3 trebles in the first 3 chain of the previous row, join, etc.


You are done with the increases. Keep doing this until you reach the width you want.
To decrease :
The idea stays the same for the inside of the rows. The only change is in the beginning and the end of each row.
Begin by a slip stitch in the beginning of the row (see pictures) :


Then work as follow :
Chain 3 and make 3 treble in the previous row.
Join with a slip stitch.

Work the rest of the row as usual, but to end the row you will need to stop one square before (join with a slip stitch and cut your yarn.)


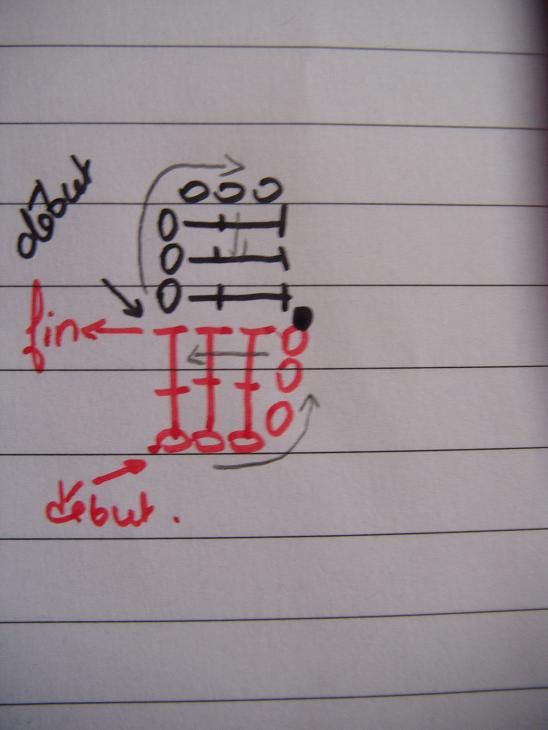
To sum it up :

This is it! I hope this helps. Don't hesitate to ask questions in the comments if you need any help. And I would be delighted to see what you make with this tutorial.
On Ravelry :

For you, scarf makers : you will work the increases until you reach the width you want. Place a marker (security pin, a contrasting thread, or whatever you want) on the side you wand to be the bottom of the scarf.
Then you will keep increasing on ONE side, and decreasing the other side as follow :

Have a nice day!
No comments:
Post a Comment