
Feel free to use this pattern for non-commercial use (friends, family, swaps)
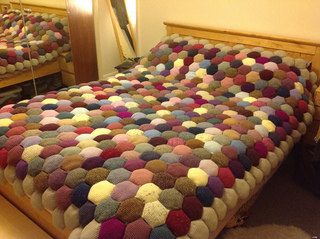
The Apiary Puff
By: Valerie Lawson 2011
Materials:
Approx. 24 yds fingering weight/sock yarn per puff
*Worsted weight cotton yarn can also be used – be sure to adjust hook size accordingly
Size F (3.75mm) crochet hook
Stitch markers
Tapestry needle for weaving in ends
Fiberfill/Scrap yarn/ Stuffing of your choice
This crocheted puff is done in rounds. Do not join rounds or turn your work.
Move your stitch markers up as you go. This makes it easy to keep track of your rounds.
Gauge: 7sc and 9 rows = 1”. The completed puff measures approx 3” across at the widest point. (does not apply to the worsted weight puff)
Special stitches: sc2tog – insert hook, yo and draw up a loop, insert hook into next stitch, yo and draw up a loop, yo and draw through all 3 loops.
Ch 12
Rnd 1: sc in 2nd ch from hook and each ch across. Continue sc around the bottom of the chain. (22 sc)
Rnd 2: sc in next stitch. Place stitch marker. (This marks the start of the round) 2sc in next stitch. Sc in next 8. 2 sc in next stitch. Sc in next stitch and place your second marker. 2 sc in next stitch. Sc in next 8. 2 sc in last stitch before the marker. (26 sc)
Rnd 3: sc around to beginning marker (26 sc)
Rnd 4: sc in marked stitch. 2 sc in next. sc across. 2 sc in last stitch before marker. Sc in marked stitch. 2 sc in next. Sc across. 2 sc in last stitch before marker. (30 sc)
Rnds 5-10: Repeat rows 3 and 4. (You will be increasing 4 stitches on every other round)
Rnd 11: sc around (42 sc)
(Begin decrease rounds)
Rnd 12: Sc in marked stitch. sc2tog. Sc across to last 2 before marker. Sc2tog. Sc in marked stitch. sc2tog. Sc across to last 2 before marker. Sc2tog. (38 sc)
Rnd 13: sc around
Rnds 14-20: Repeat rows 11 and 12. (Decreasing 4 stitches on every other round)
Fasten off, leaving a long enough tail for sewing the top together.
Stuff your puff! Make it as flat or fluffy as you want.
Slip stitch or sew the top of the puff together. Take care to leave the top flat and even with the bottom (in order to keep the shape consistent). Weave in ends.
Enjoy the squishy puffy goodness!
No comments:
Post a Comment